
Keeping your off-road machinery running efficiently depends not only on routine oil changes but also on the proper working condition of every oil pressure sensor. An accurate reading protects your engine from catastrophic wear, which is caused by low oil pressure. However, when the sensor malfunctions, it can trigger false warning signals or conceal serious problems. This guide will show you exactly how to identify, test, and replace your oil pressure sensor, ensuring your equipment remains safe, reliable, and productive under harsh field working conditions.
What Is an Oil Pressure Sensor?
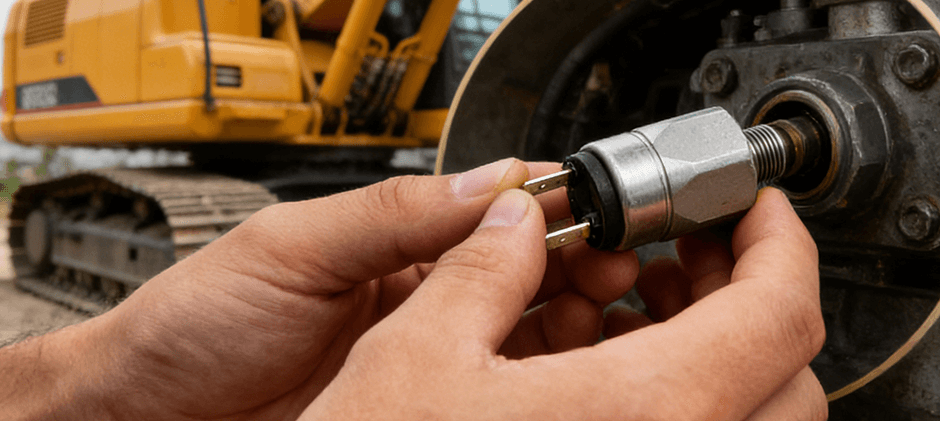
Oil pressure sensor (sometimes also called oil pressure sender or switch) is one small but extremely important component, used for monitoring the oil pressure inside the engine. It will continuously send the reading to the control unit or to the oil pressure gauge on the instrument panel. If the oil pressure drops, the sensor triggers a warning light or fault code, providing an early alert to the operator to prevent major repairs.
Off-road machinery such as excavators, backhoe loaders, tractors, and loaders rely on accurate oil pressure monitoring because their engines need to operate under very high loads for a long time period. Without continuous lubrication, the internal metal components will rub against each other, leading to piston seizure and finally causing failure of the entire system.
How It Works
- Pressure detection: A diaphragm or strain gauge inside the sensor flexes according to oil pressure.
- Electrical conversion: The movement translates to changes in resistance or voltage that your machine’s ECU can read.
- Signal output: These signals appear as values or warning lamps on the dashboard, alerting you if oil pressure drops outside the safe range.
Causes of Oil Pressure Sensor Failure
Failures are common, especially in off‑road machinery, where harsh terrain, vibration, and temperature fluctuations test every component. Understanding root causes helps prevent repeated breakdowns:
1. Prolonged Exposure to Heat and Vibration
Continuous engine heat softens sensor seals and damages internal circuitry. Constant vibration from heavy-duty use can loosen connectors or break wiring.
2. Oil Contamination
Dirty or sludgy oil can clog the sensor’s tiny pressure port, causing false readings. Contamination gradually corrodes sensor materials, especially in older machines with infrequent oil changes.
3. Mechanical Damage
Impacts during maintenance or contact with nearby components can crack the housing. A damaged sensor body often leads to external oil leaks.
4. Electrical Faults
Corroded terminals, loose plugs, or shorted wires interrupt communication between the sensor and ECU. Intermittent signal loss shows up as flickering dashboard warnings.
5. Inferior Replacement Parts
Cheap sensors without proper resistance calibration deliver erratic readings. Always use OEM or tested aftermarket units built for heavy equipment standards.
Perform a Preliminary Inspection
Before replacing the sensor, please first conduct a simple inspection, so as to avoid the unnecessary replacement of parts.
- Check the oil levels: Oil at a low level may simulate the condition of a defective sensor, yet in reality, it indicates an actual maintenance requirement.
- Inspect the wiring: Carefully observe whether there exist frayed cables, loosened connectors, or metal contacts that are exposed.
- Look for leaks: The presence of oil residue near the base position of the sensor signifies that the internal sealing structure has already failed.
- Measure visually: A sensor housing that appears swollen or cracked serves as a direct confirmation of damage.
If everything else checks out but the dashboard warning persists, proceed to test or replace the oil pressure sensor.
Step‑by‑Step Guide to Replace an Oil Pressure Sensor
Replacing the sensor on heavy machinery—such as loaders, excavators, or tractors—is simple when performed carefully.
Tools and Equipment Needed
| Tool | Purpose |
|---|---|
| Deep or sensor socket (24 mm typical) | To remove and install the sensor without damage |
| Torque wrench | To tighten accurately |
| Ratchet handle | For leverage and control |
| Thread sealant | To seal threads against oil leaks |
| Rags or cloths | To keep the workspace clean |
| Safety gloves & goggles | To ensure safe handling |
1. Disconnect the Power Supply
Always disconnect the negative terminal of the battery. This prevents electrical short circuits when unplugging the sensor cable.
2. Locate the Sensor
The oil pressure sensor is usually mounted close to the engine oil filter or directly on the crankcase’s main gallery. In some large machines, it sits on remote oil lines for easier servicing. Refer to your model’s workshop manual if uncertain.
3. Unplug the Electrical Connector
Depress the locking tab and gently remove the electrical plug. Avoid pulling on the wiring itself, as this can tear insulation or loosen pins inside the connector.
4. Remove the Faulty Sensor
Position a rag under the sensor port to catch residual oil. Fit the correct socket and rotate counterclockwise to loosen the part. Once removed, check if any oil leakage or thread wear is noticeable.
5. Clean the Mounting Surface
Wipe away any oil, dust, and sealant residue from the mating surface. Clean threads ensure a leak‑free seal with the new sensor.
6. Install the New Sensor
- Compare the new unit against the old one to verify matching threads and connector orientation.
- Apply a thin layer of thread sealant if the replacement doesn’t include a pre‑applied coating.
- Screw the sensor in by hand until snug. Then tighten it with a torque wrench according to the manufacturer’s torque value. Avoid overtightening, which can crack the housing.
7. Reconnect the Electrical Connector and Power
Plug the electrical connector back in until it clicks securely. Reattach the battery terminal, positive first, then negative.
8. Perform a Functional Check
Start the engine and observe the oil pressure gauge. The warning light should disappear within seconds. Inspect the area around the sensor for any fresh oil leaks. Completion of this process restores precise oil pressure readings, ensuring the reliability of your machine’s lubrication system.
How to Test an Oil Pressure Sensor?
Testing helps confirm if the issue lies in the oil pressure sensor or in the actual oil system.
Method 1: Electrical Test
- Disconnect the sensor plug.
- Use a multimeter to measure resistance between the signal and ground terminal.
- Compare the reading to the specs in your repair manual.
- If readings are far off, replace the unit.
Method 2: Mechanical Oil Pressure Test
- Remove the sensor and attach a mechanical oil pressure gauge.
- Start the engine and note the pressure reading.
- Compare actual pressure to machine specifications.
- Normal pressure → faulty sensor.
- Low pressure → possible oil pump or lubrication issue.
| Condition | Gauge Reading | Likely Issue |
|---|---|---|
| Normal | Within factory range | Faulty sensor or connector |
| Low | Below the manufacturer’s range | Oil pump or clogged filter |
| Fluctuating | Constantly changing | Wiring fault or contaminated sensor |
When to Replace the Oil Pressure Sensor?
Replace the sensor if:
- Oil warning light stays on despite correct oil levels.
- The gauge shows erratic fluctuations without engine noise or leaks.
- Diagnostic trouble codes (like low-pressure circuit faults) persist after resets.
- The sensor body shows cracks or oil seepage.
Since sensors are relatively inexpensive and vital for safety, it’s usually wiser to replace them once faults appear rather than risk engine wear.
For reliable aftermarket replacements, explore tested and compatible sensing components, including oil pressure sensors, temperature sensors, and speed sensors designed for heavy equipment. They provide strong performance against vibration, corrosion, and thermal changes—all key conditions for off-road applications.
Maintenance Tips After Replacement
- Change engine oil and filter at recommended intervals to prevent contamination.
- Inspect harness connections after servicing other engine parts; rough handling can dislodge the plug.
- Monitor dashboard readings periodically. Early irregularities often point to wiring corrosion or dirty connectors instead of immediate hardware failure.
- Keep spare sensors if your machines operate remotely. Quick swaps minimize downtime.
Final Checks Before Returning to Work
Before resuming full operation, run the machine at idle for several minutes. Ensure pressure readings stay stable across temperature changes. Record baseline values from the new sensor so you can compare future trends during routine maintenance logs.
Conclusion
Consistent lubrication is the heart of any off‑road engine, and a functioning oil pressure sensor guarantees that protection. Replacing this component requires only a few tools but delivers security against unplanned downtime. For durable, field‑tested replacements, explore precision sensing components engineered for off‑road machinery. High‑quality sensors ensure accurate readings, reduced maintenance interruptions, and continuous performance—whatever terrain your equipment faces.