

Need to clean a lawn mower carburetor? Your mower won’t start, runs rough, or dies mid-cut? A clogged carburetor is usually to blame. Over time, old fuel left turns gummy, clogs tiny fuel jets and starves the engine of gas. I’ll show you the signs of a dirty carb, and two detailed ways for cleaning it: a fast fix for light grime, and a thorough deep clean.
Signs Your Lawn Mower Carburetor Needs Cleaning
Your lawn mower will show obvious signs when gunk builds up in the carburetor. The carb mixes air and gas just right so the engine can burn fuel. Once it gets dirty, that balance gets messed up, and your mower runs poorly. Watch for these common issues:
- Won’t start at all: If your spark plug’s fine and you’ve got new gas, a clogged carb is almost certainly to blame. Not enough fuel makes it to the engine to fire up.
- Stalls right after starting: It might turn on when you pull the choke (which dumps extra gas in), but dies once you let the choke off. That means the main fuel path is too blocked to keep the engine running.
- Rough, up-and-down revs: Even if you hold the throttle steady, the engine speeds up and slows down by itself. Partial gunk restricts fuel flow, throws off the air-fuel mix, and messes with the mower’s speed control.
- Black smoke out the exhaust: This means too much gas and not enough air. Dirt can jam the carb’s float open, flooding the fuel bowl and dumping excess fuel into the engine.
- Gas leaks from the carb: If you spot fuel dripping here, something’s clogged or worn. Usually, the float needle sticks, or the rubber seal under the fuel bowl cracks and dries out—cleaning the carb fixes both problems.
If you notice any of these problems, a full carb clean will best sort them out.
How to Clean a Lawn Mower Carburetor Without Removing It?
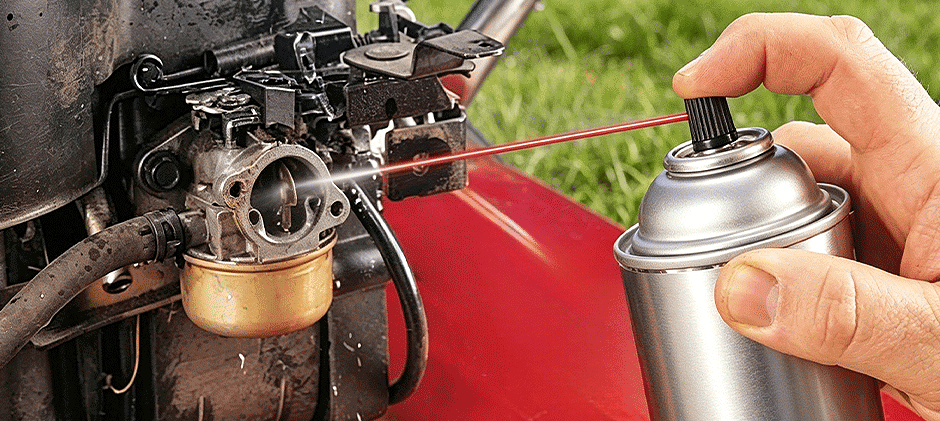
Use this method if your mower still runs but feels rough. It clears small carb clogs fast, and you’ll usually be back mowing in under 30 minutes. We’ll do this in two simple steps: quick basic checks, then an easy float bowl cleaning.
Part 1: Quick Pre-Checks
Do these fast checks first before touching the carb — it’ll save you tons of unnecessary work.
- Check the air filter: First, unplug your spark plug wire to stay safe. Take off the air filter cover and inspect the filter. If it’s packed full of dirt and gunk, it’ll block airflow to the engine. This causes a rich fuel mix and black smoke, which feels like a carb problem. Just swap out a dirty filter for a new one.
- Check the linkages: Look at the springs and rods hooked up to the carb. Move the throttle and choke back and forth to make sure these parts move smoothly, no sticking or binding. Built-up grime often jams these small parts and causes running issues.
Part 2: Remove and Clean the Float Bowl
If your air filter is clean and linkages move freely, the float bowl and main jet are almost always the problem spots — let’s clean them.
- Access the carb: Keep the spark plug wire disconnected, then remove the air filter so you can fully see the carburetor.
- Find the float bowl: Look at the very bottom of the carb. That small metal cup is the float bowl, held on by one single bolt in the center bottom.
- Take off the bowl: Put a rag or small container under the carb to catch spilled gas. Use a socket wrench to loosen and remove the bottom bolt. Fuel will drain out as you loosen it, then pull the bolt and bowl off completely.
- Clean the bowl and main jet: The bowl will usually have sticky varnish or crusty white buildup from old gas. Spray carb cleaner inside the bowl and wipe it completely clean. That bolt you removed is actually the main jet — it has a tiny hole running straight through the middle, and this is where clogs happen most. Spray carb cleaner straight through the hole, then hold it up to light to make sure the hole is fully clear all the way through.
- Clean the carb body: With the bowl still off, spray carb cleaner up into the bottom of the carb. Focus on the central brass tube (emulsion tube) and every small hole you can see to clear hidden gunk.
- Put it all back together: Reinstall the float bowl carefully. Make sure the rubber gasket sits flat and tight to stop gas leaks. Tighten the main jet bolt firmly, but don’t over-tighten it — you can strip the threads easily.
Put the air filter back on, reconnect the spark plug wire, then start your mower. It might take a few extra pulls to refill the bowl with fuel, that’s totally normal.
If this quick clean doesn’t fix your mower’s issues, the clogs are deeper inside the carb’s internal passages. You’ll need to remove the carb and do a complete deep clean.
Cleaning a Carburetor After Removal
Do this deep clean if your mower refuses to start, or the quick bowl cleaning didn’t fix the problem. Take photos every time you take a part apart. These photos will help you put everything back correctly — especially the small linkages.
Take the carburetor off
- Stay safe first: Unplug the spark plug wire and tuck it away so it can’t touch the plug.
- Remove the air filter housing: Undo the bolts and take off the whole air filter assembly sitting in front of the carburetor.
- Pinch off the fuel line: Find the rubber fuel hose connected to the carb. Use a hose clamp or small locking pliers to squeeze it shut. This stops gas from leaking out while you work.
- Disconnect fuel line and linkages: Slide the hose clamp back, then twist and pull the fuel line off the carb inlet. Next, carefully unhook the thin metal throttle and choke rods. Use your photos to remember exactly where they attach. You can usually twist the carb a little to create slack and pop them free.
- Unbolt the carburetor: The carb is held on the engine with two long bolts. Remove them, and the carb will come right off.
Take it apart and soak the parts
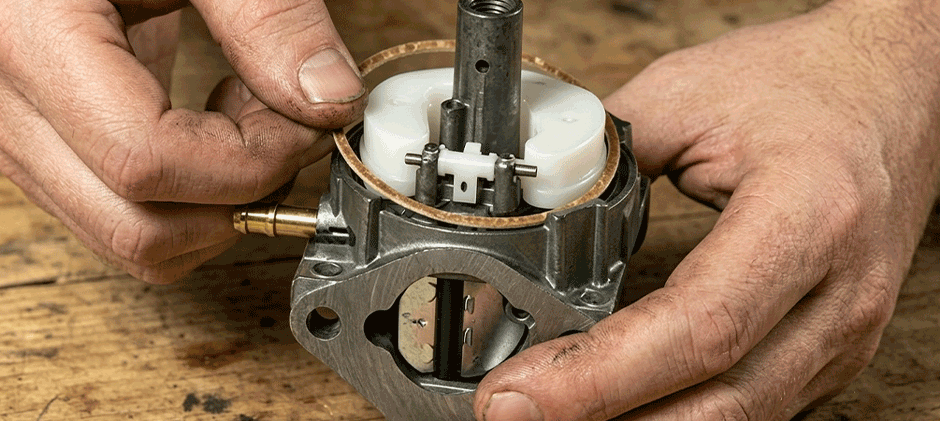
- Take the carb apart: Remove the float bowl bolt and take off the bowl. To remove the float, use a small pick or nail to push out the tiny hinge pin. The float and needle valve will lift right out.
- Take off all gaskets and O-rings: Peel off all rubber and paper seals. Do not soak these parts in carb cleaner — the strong solvent will swell and ruin them.
- Clean and soak the metal parts: Spray every metal piece of the carb, inside and out, with carb cleaner. For heavy, baked-on varnish, use a carb dip can from an auto store. Let the metal parts soak for about an hour to dissolve tough buildup.
Clear every fuel passage and jet
- Flush all holes: Use the thin spray straw that comes with your carb cleaner. Spray through every small hole and passage on the carb body. If cleaner sprays out from another opening, that means the path is clear.
- Fix clogged jets the right way: Never use a paperclip, nail, or drill bit to clear a blocked jet. These tiny holes are precision-made, and scraping or widening them will ruin your mower’s fuel mix forever. Instead, use an ultra-soft thin wire — like a single wire brush bristle or a clean bread tie wire (burn off the paper first). Gently work it through the jet to break loose gunk, then spray it clean again with carb cleaner.
Reassemble and test
- Put the carb back together: Rebuild the carb in reverse order of how you took it apart. I highly recommend a cheap carb rebuild kit. It comes with brand-new gaskets, O-rings, and usually a new needle valve. It ensures a tight seal and prevents future leaks.
- Reinstall the carb: Use your photos to reconnect the throttle and choke linkages correctly — this is where most people make mistakes. Bolt the carb back to the engine, reattach the fuel line, then reinstall the air filter housing.
- Test the mower: Unclamp the fuel line and reconnect the spark plug wire. Pull the engine a few times to let fuel refill the float bowl. Your mower should start easily and run smoothly now.
Conclusion
Cleaning your lawn mower carburetor is an easy DIY fix. It restores engine power and fixes startup troubles. You can either spray it quickly with carb cleaner or take it fully apart for a deep clean. If you pull it apart and see heavy rust or damage on the carb body, cleaning won’t cut it. FridayParts has plenty of high-quality aftermarket carburetors in stock that fit most small engine brands. Replace one in, and your machine will work like new in no time.
