

There are many oil seals and gaskets in an engine to lock lubricant inside to grease and cool various parts. The camshaft seal is one of the most critical engine parts. While made from tough materials, the cam seal can wear out over time, causing serious oil leaks and costly repairs. In this blog, we’ll walk you through the symptoms, causes and fixes of a camshaft seal leak.
What Is A Camshaft Seal?
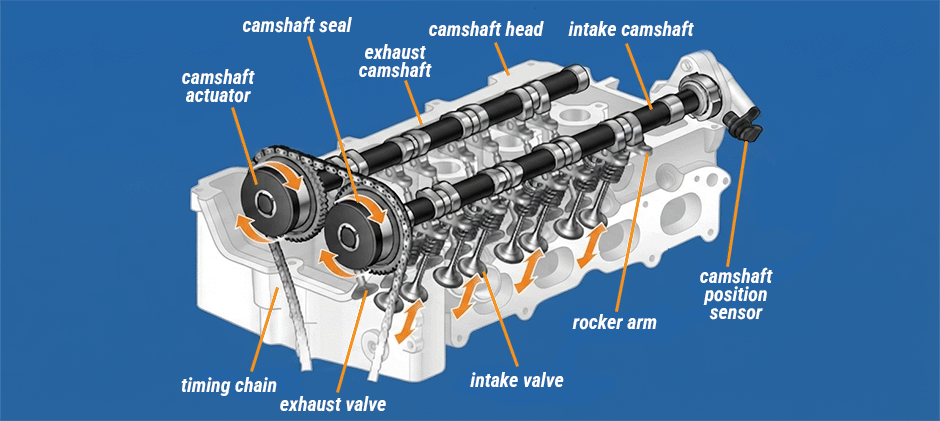
Camshaft seals are the oil seals on one end of the camshaft or camshafts. These cam seals are used on engines with timing belts only. Their primary function is to prevent pressurized engine oil from leaking from the cylinder head and to prevent dirt and debris from contaminating the engine’s timing system. Typically, the cam seal is made of sturdy rubber, making it durable enough and requiring no frequent replacement. However, you still run into problems with it.
Symptoms of A Bad Camshaft Seal?
Like any other part, a cam seal wears out over time. Once the seal fails, it will cause damage to the rest of the engine if left unaddressed and costly engine repairs. So, it’s essential to watch for these early signs of a camshaft seal:
- Check engine light on
- Oil leaking from behind the timing cover
- Oil leaking around the front or rear of the cylinder head
- Oil leaks as spots or puddles of lubricant on the ground
- Cylinder misfire and erratic acceleration response
- Smoke from the engine bay
- Burning oil smell caused by oil dripping onto hot engine components
- Engine performance issues if the oil leak becomes severe
What Causes A Camshaft Seal to Leak?
These are the primary causes of a camshaft seal leak:
- Normal wear and tear: Even though the cam seals are made from robust rubber or synthetic materials, these seals are subjected to extreme temperature fluctuations and friction and are easy to crack or lose their elasticity over time.
- Crankcase over-pressurization: The engine’s Positive Crankcase Ventilation (PCV) system relieves internal pressure. If the PCV valve or oil trap becomes clogged, that pressure builds up inside the engine and forces engine oil past the flexible lips of the camshaft seals.
- Camshaft wear: If the camshaft bearings are worn out, it causes “play” or radial movement in the camshaft itself. This abnormal vibration or wobbling forces the camshaft against one side of the seal, creating a gap for oil to escape.
- Improper installation: During previous repairs such as timing belt replacement, the cam seal might have been pushed in at an uneven angle or nicked by a metal tool, compromising its structural integrity from the start. Shop quality timing belt here.
- Oil contamination & sludge: Dirty oil filled with abrasive carbon particles can wear away the inner lip of the cam seal, while highly degraded or low-quality oil can accelerate the hardening and deterioration of the rubber seal.
What to Do for A Camshaft Seal Leak?
Engine oil is used as a lubricant to prevent excessive friction on various parts and components of your vehicle. Without a proper amount of oil, it may lower your vehicle’s reliability. So, once you notice the signs of a failing camshaft seal, it’s essential to deal with it immediately to prevent the problem from getting worse.
While this issue may not cause immediate damage to your engine, you have to replace the camshaft seal as soon as possible because it’s a simple part to replace. If you are not sure if you are dealing with a camshaft seal leak but are noticing oil leaks, it is recommended to take your vehicle to a trusted mechanic for an accurate diagnosis.
How to Replace A Camshaft Seal?
Replacing a camshaft seal is a labor-intensive repair that is usually best left to a professional technician. If you need to replace the camshaft seal yourself, here are steps on how to do it easily.
Tools and Materials Required
- Brake clean
- Breaker bar (optional)
- Coolant drain pan
- Camshaft sprocket holding tool
- Jack and jack stands
- Lint free rags
- Multi-purpose grease
- Oil drain pan
- Oil seal puller (optional)
- Piece of wood
- Power tools (including ½ drive electric impact, ⅜ and ¼ electric ratchets, ⅜ mini impact, ¾ drive impact, air filler gauge for tires, and coolant vacuum filler)
- Protective gloves
- Wrenches, ratchets and sockets of the appropriate size
- Reel of air hose
- Repair manuals (optional)
- Safety glasses
- Tarp to lay under the car
- Threadlocker
- Torque wrench
Prepare Your Vehicle
Before you start, you should use a hydraulic jack to raise your vehicle and support it with jack stands. Then chock the wheels and set the parking brake. To drain the engine oil, you should place an oil drain pan under the vehicle and remove the oil drain plug with a wrench or ratchet & socket.
Remove the Timing Belt and Associated Components
Remove the timing belt and related components to access it. Then, use a camshaft sprocket holding tool and a long ratchet & socket or a breaker bar to remove the sprocket bolt and the camshaft sprockets.
Remove the Camshaft Seal
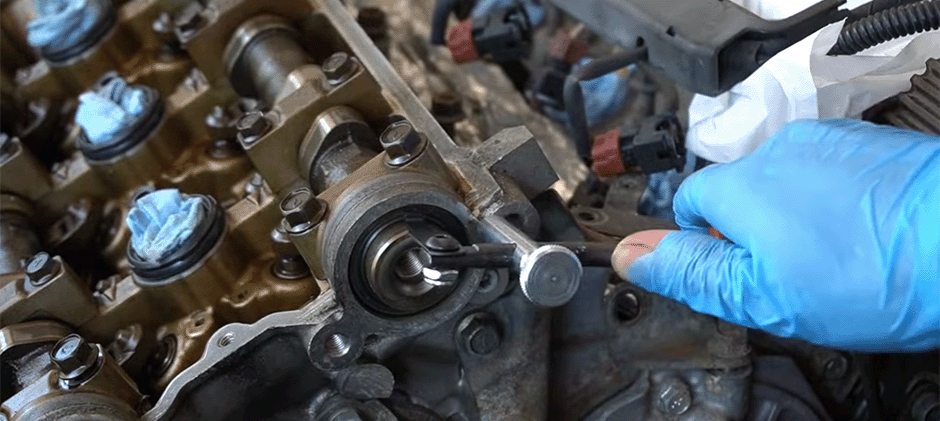
Pry the camshaft seal out with a screwdriver or dedicated oil seal puller. Be careful not to scratch the camshaft during this step, or the seal will leak.
Install New Camshaft Seal
Before installation, you should prepare the sealing area and new seal. This involves two steps. The first step is to spray brake clean into the sealing area, wipe it clean with a lint-free rag and put some multi-purpose grease inside the seal to keep the spring in place. The second step is to mount the new seal in place around the camshaft and use a hammer to hit the socket and drive the seal into place.
Reinstall the Timing Belt and All Components
Reinstall the camshaft sprockets, timing belt and associated components in order. First, apply threadlocker to the sprocket bolt threads. Next, use a camshaft sprocket holding tool to hold the sprocket in place. Then, install the sprocket bolt using a long ratchet and socket or a breaker bar. Torque the bolt to the specification listed in the vehicle repair manual. Finally, reinstall the timing belt and all components needed to access it.
Finish the job
Refill the engine with the correct type and amount of oil as listed in the vehicle repair manual. Next, use a hydraulic jack to raise the vehicle and remove the jack stands. Then, lower the vehicle and remove the wheel chocks.
This is clearly a big job. Accessing the seal often requires removing the timing belt or timing chain and properly resetting the engine timing. Incorrect installation can lead to serious engine damage, especially on interference engines. If you’re experienced, you can do it yourself according to the manual and YouTube videos. But if you’re lacking enough experience in this kind of DIY work, it’s better to turn to a professional for the camshaft seal replacement.
Final Words
The camshaft seal is a small, critical part in your engine. Replacing this small part can save you from major engine damage and expensive repair costs. As a responsible owner, you should always choose to be preventive instead of reactive and keep regular maintenance like replacing a worn-out camshaft seal. At FridayParts, we provide an extensive selection of quality engine spare parts to keep your vehicle running at its optimal performance. Enjoy your fixing and new rig now!
Keep Reading
Does the Crankshaft Seal Leak? Signs and Fixes
How to Replace the Camshaft Sensor Right?
6 Signs of a Bad Camshaft Position Sensor and How to Test It?
